The menu bar provides quick access to all the functionality available for the currently active module.
The menu bars contains links to all of the functionality of Data Crow. This help page will explain the basic meaning of the menu.
File
Items can be created, deleted, or opened. You can also view events or quit the application.
Item Wizard. The item wizard is a quick way to add new items to the database (apart from importing them from a CSV or XML file). It will first start with an online search (if the module supports online searches). After the item has been found it allows you in the next step to edit the item manually. After finishing the wizard the item is saved to the database.
New <name> Item. With the New <name> Item menu option (the <name> will mention the item name, such as Movie in the Movie module) you can add a new item to Data Crow, manually. It will open the item form. If there are templates available you can also choose to create a new item, based on an existing template.
Open <name> Item. The Open <name> Item menu option (the <name> will mention the item name, such as Movie in the Movie module) opens the currently selected item (in the overview) in the item form. The item information cannot be changed using this option, it will open the item read-only.
Edit <name> Item. The Open <name> Item menu option (the <name> will mention the item name, such as Movie in the Movie module) opens the currently selected item (in the overview) in the item form. The item form allows you to change the information on the item.
Save all. The table view allows you to edit the items directly in the view. To save all changes you have made you can use the save all menu option.
Delete. Deletes all selected items (in the view) from the database. This cannot be reverted (only by restoring a backup). The system will ask for confirmation first.
Show Log. The log shows events, things that happened in the system. If something went wrong, Data Crow will log an error here. Always a good place to look if you are having issues. It will also show informative messages, “I did this at this and this time”. The System Information tab shows additional information. What directories are being used, how much resources are available, which Java version is used, etcetera.
Exit the application.
Administration
Maintain. Most modules make use of drop downs or multi-reference fields. An example is the state field for software items. This state field has a default set of values. You can modify this list, completely. The administration of these items (we call them property items, part of property modules) can be done from within the administration menu.
Maintain Templates. You can create templates for your items. If you always fill certain fields with specific values you can pre-populate these fields by using a template. You can create as many templates as you like. You can choose to mark a template as a default template, meaning it will always be applied, and/or you can choose the template when creating a new item from the File Menu.
Loan Administration. This overview gives you a complete picture of your current loans, historical loans and overdue items. It has some powerful search options for you to work with.
Experience Level
This switches Data Crow to the “Beginner” mode, hiding many of the options within the various menus.
This switches Data Crow to the “Expert” mode, giving access to all tools and options.
Modules
Create Module Wizard. This tool allows you to create a new module. It is a powerful tool allowing you to design your own collection management section within the application. Items stored in these modules are stored in the database, just as is done with the default modules. You’ll have many of the standard tools at your disposal when managing your items. There is a separate manual available for download from the website.
Copy Module Wizard. This wizard based tool allows you to create a new module based on an existing module. It saves you from having to define each and every field while there is another module already available which almost fits your needs.
Alter Module Wizard. In case you want to add a field to one of the modules you can use the alter module wizard. This powerful tool allows you to change existing fields or add new fields. Additionally you can modify some of the settings (indicate if items of this module can be lend to others for example).
Relate Module Wizard. A wizard driven tool which allows you to create a parent-child relationship between two modules. An example of such a relationship can be found in the Music Album module. This module is the parent of the Music Tracks module. This means that music tracks cannot exist without the music album. There is no way to remove this relationship; be careful using this tool!
Delete Custom Module Wizard. Wanting to delete a module? This is the wizard to be used. In two simple steps the module will be destroyed. This cannot be undone. Note that you can also disable modules from within the settings. This hides the module without removing it. This option is not available in case you have not created or imported a custom module.
Export Module Wizard. So you have created this really awesome module! So much work while it is only in use in your local installation. Why not share it with other persons? Use the export module wizard to export the created module structure along with its settings, data and pictures. This option is not available in case you have not created or imported a custom module.
Import Module Wizard. This tool allows you to import a module previously export with the export module wizard. It’s a simple process which will load the module, its items, settings and pictures.
Active Module. From here you switch between modules. Simply select the module to start using it. This menu is here in case you have disabled the module list, the area where modules normally are selected.
View
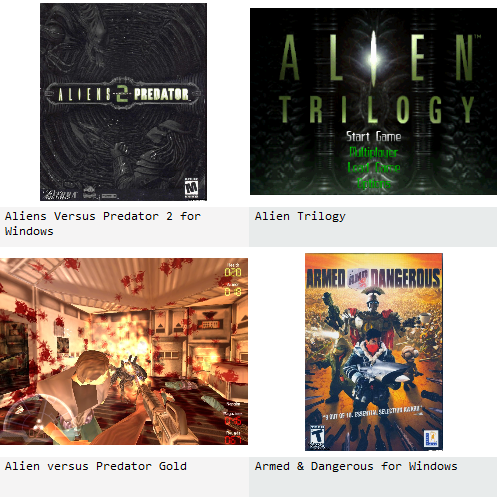
Card View. The card view is graphically the nicest looking view. Items are displayed as small cards and show a picture and a short description of the item based on the field settings, “is descriptive”.
Table View. The table view allows you to edit items directly in the view, without having to open the item form.
Filter. The Filter allows you to build complex filters to find your items. These filters can even be stored, so you can use them again in the future. Find and Replace. Find values in items and replace these values with a new value.
Re-apply Filter. Applies the filter again, refreshing the view completely.
Settings. The Settings view allows you to change all of the system settings. It contains settings such as the proxy server, program associations, font options and much, much more. These settings are stored per computer. So if you run multiple installations, from multiple computers, but share the same user folder, these settings are not shared between the computers. All the rest will be shared, but not these settings.
Change User Folder. Allows you to select a different user folder. A user folder is where Data Crow stores all of your data. Switching between user folders allows you to have several instances of Data Crow running, each instance not knowing anything about any about each other. Optionally you can even create separate shortcuts / links to Data Crow where for each you supply a different user folder location, using the -userdir command. See this section for more information,
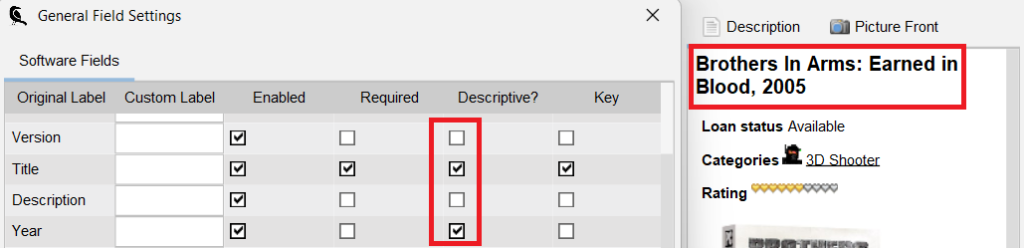
General Field Settings. Don’t want to use a certain field? Want to change the label on one of the fields? Each and every field option can be found here. These are very important settings and it is always good to take a look at this section. The most important part might be is that you can indicate how your items are described with the “Descriptive?” option. Read more here.
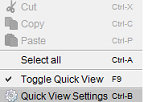
Quick View Settings. The quick view can be modified to your desires. Here you can indicate which fields should be shown and in which order.
View Settings. To modify the current view, such as the colors and the information to be shown, you have to use the View Settings. The settings differ slightly between the Card View and the Table View.
Item Form Settings. Change the appearance of the item form. You can even assign fields to tabs and change the order of the fields.
Look & Feel. The Look and Feel determines how the fields and such look in the application. It’s best just to try it for yourself!
Resource Editor. Any label can be changed or translated using the Resource Editor. You can even create a whole new language pack.
File Import. Extracts information from the files on your system. For music albums for example Data Crow can get the name of the artist and album from the MP3 or other file formats. Additionally it can find missing information using one of the online services. This tool is only available for “file backed” modules / items. This should not be confused with the ability of Data Crow to import items from text files. Use the Item Importer to import items from a CSV, text or XML file.
Online Search. Find information on your items online, select the item and save it. Not all modules will have this tool available. Custom modules won’t either unless you have programmed one specifically for your module.
Mass Update. Update many items at once, using the online search and file import capabilities of Data Crow.
Create Report. Create file based reports, such as a PDF document. If this menu option is not available it means that no reports have been defined for your module. There is a manual available on how to do this.
Charts. Create a graphical representation on the information of your items.
Item Export Wizard. Export your items to a CSV or XML (recommended) file.
Update All. Update many items (or all..) at once. This is a simple, but powerful, tools applying manually entered values to multiple items at once.
Find & Replace. Replace one value with another value within text fields. It will show you a preview first (luckily) before it is applied on your items.
Auto Numbering. Number, or renumber, your items. All of them and all at once. It even has options to skip or fill gaps in the numbering.
Title Rewriter / Name Rewriter. Rewrites the titles of your items. It’s a great tool to change titles from “The Doctor” to “Doctor, The” for example. The person rewriter is different for person records as opposed to other items.
Backup & Restore. Create a full backup of your data, including settings, modules and pictures. And it also allows for restore backups (just saying..).
Database Editor. Direct access to the database. It ignores all the safety rules I have built into the application. Use at your own risk! (make.. backups..)
Drive Manager. Scans your drives for files added to Data Crow and corrects the file links in case the file has been moved or renamed. An undervalued but oh so sophisticated tool.
File Renamer. Rename files on your drives based on the information present in Data Crow. It also allows you to move files to a new location and a new folder structured. It will show you a preview first before doing anything.
Plugins
This menu is not present by default. This menu will only be shown if you have additional, custom made, plugins installed.
Help
Contains a link to the about dialog, the tip of the day, the donation page and the help.
The toolbar give you quick access to the most important option within Data Crow. Additionally it allows for quick searching on the items of the selected module.
A short description per tool follows here:
Item Wizard. Starts a wizard to quickly add a new item.
Using the Quick Search you can easily search on all values of the items at once. Looking for an item of the year 2013? Type 2013 in the Quick Search and Data Crow will search in all fields of the items for the value 2013.
Apply the filter by clicking on the icon or by pressing the Enter key.
Undoing a Search
To undo a search click on the icon.
Saved Filters
If there are saved filters present, you can select a filter from the “Filters” list. The Filters section of the help explains the creation of filters in more detail. Press the icon to open the Filter Dialog.
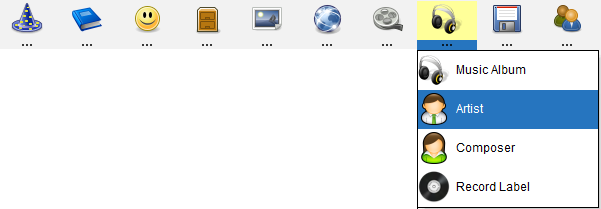
The module list shows the modules you can work with. You can switch between modules at any time (even during imports). The active module is highlighted.
Some modules have sub modules assigned to them. For example, the movies module has a sub module called actors. These sub modules support the main module; the Actors can be assigned to movies.
Click on the small bar at the bottom of the module button. This will allow you to select any of the sub modules.
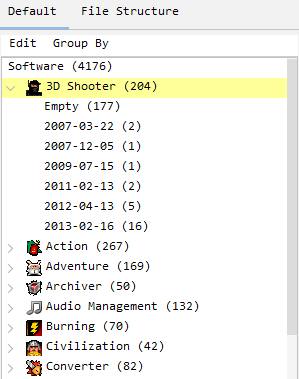
The grouping pane allows you to group items, having the same characteristics, together. You can group items on multiple levels (as many levels as there are fields to group on). Find more information here.
Existing items are displayed in the middle section of the screen. The displayed items can be opened, updated or deleted. All of this is explained in the views section of the help.
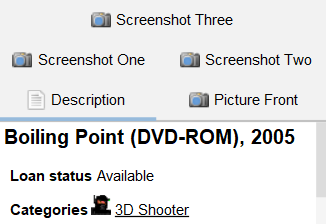
The Quick View gives a quick representation of the item. Whenever you click on an item in the view its content will be displayed in the quick view.
The title as shown on the Details tab is based on the field settings. It is the combination of the fields marked as “Descriptive?”.
You can open the item from here as well, simply by double-clicking on the quick view.
Underlined sections are items, files or web links you can click on (this depends on the type of field. Below is an example of two items, categories, which can be opened by clicking on their links:
For items the item form will be opened. Files and web links are handled by your own operating systems; a web links will most likely be opened in your favourite browser, a file will be opened with the associated program.
If your Quick View settings allow for it and if your item has images, these are displayed in separate tabs. Simply click on the corresponding tab to view the image:

 Contains a link to the about dialog, the tip of the day, the donation page and the help.